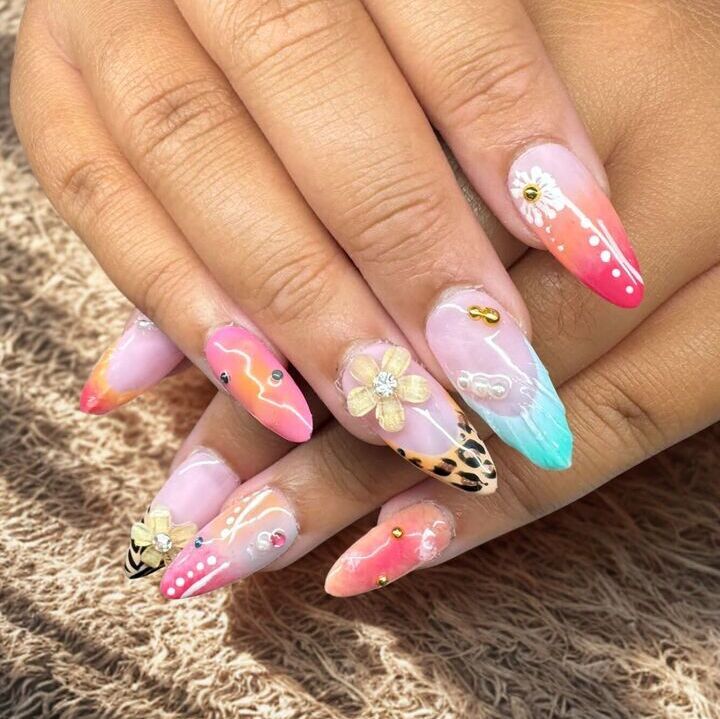
Choosing the right application method depends on how long you want your press-on nails to last and whether you plan to reuse them.
APPLICATION
1. Trim and Shape Your Nails
Start by trimming your natural nails to your desired length. Use a nail file to smooth and shape the edges. This helps the press-on nails fit comfortably and adhere properly.
2. Push Back the Cuticles
Using the cuticle stick from our Prep Kit (or a suitable tool), gently push back your cuticles. This creates a clean surface and helps prevent lifting.
3. Buff and Clean Your Nails
Lightly buff the surface of your nails using a sponge buffer to remove shine and natural oils. This helps improve adhesion.
After buffing, cleanse your nails thoroughly with an alcohol pad to remove dust and residue.
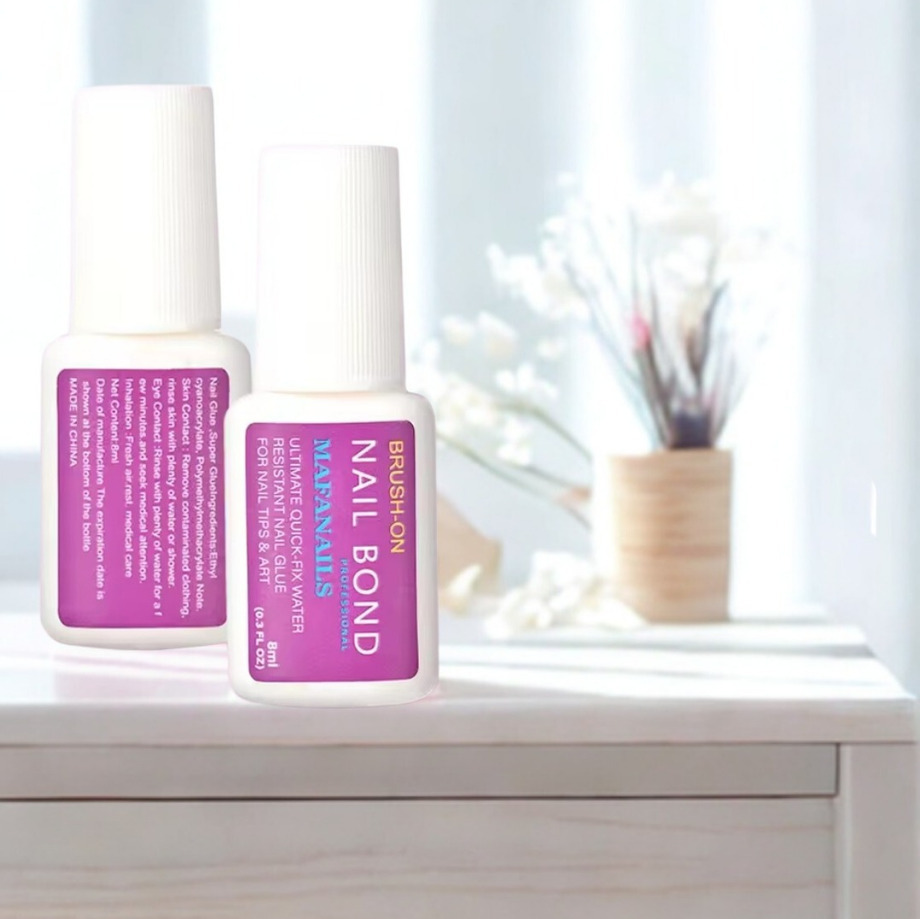
Optional Nail Glue Use
Nail glue can be used if you prefer a stronger hold, however nail glue is not included with your set. Please note that glue can be messy, may damage the design, and will make your press-on nails non-reusable
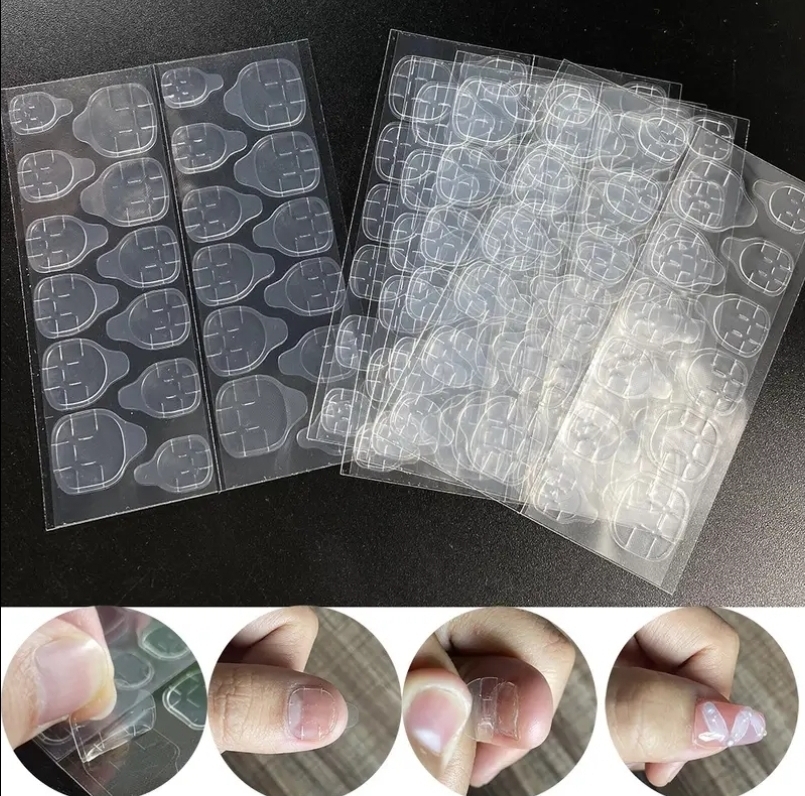
4. Apply Sticky Tabs
Select the correct size sticky tab for each nail. Peel the tab from the backing and apply it firmly to your natural nail.
For extra hold, gently warm the sticky tabs with a blow dryer for a few seconds once applied—this helps activate the adhesive.
5. Attach the Press-On Nails
Align the press-on nail at a 45-degree angle, then press down firmly. Hold in place for approximately 15 seconds, applying even pressure to avoid air bubbles.
6. Avoid Water Exposure
Avoid water for at least 2 hours after application. This allows the adhesive to fully set and ensures longer-lasting wear.
Sticky Tabs
Lasts up to 1 week Best for short-term wear & reuse Apply sticky tab to natural nail and press firmly for 30 seconds. Remove the protective backing. Apply press-on at a 45° angle, press for 10–15 seconds. Avoid water for 2–3 hours.
Nail Glue
Lasts up to 3 weeks Strong hold, may reduce reusability Apply a small amount of nail glue to the underside of the press-on. Apply at a 45° angle, press firmly over the entire nail. Hold for 10–15 seconds. Handle gently — jewels, not tools.
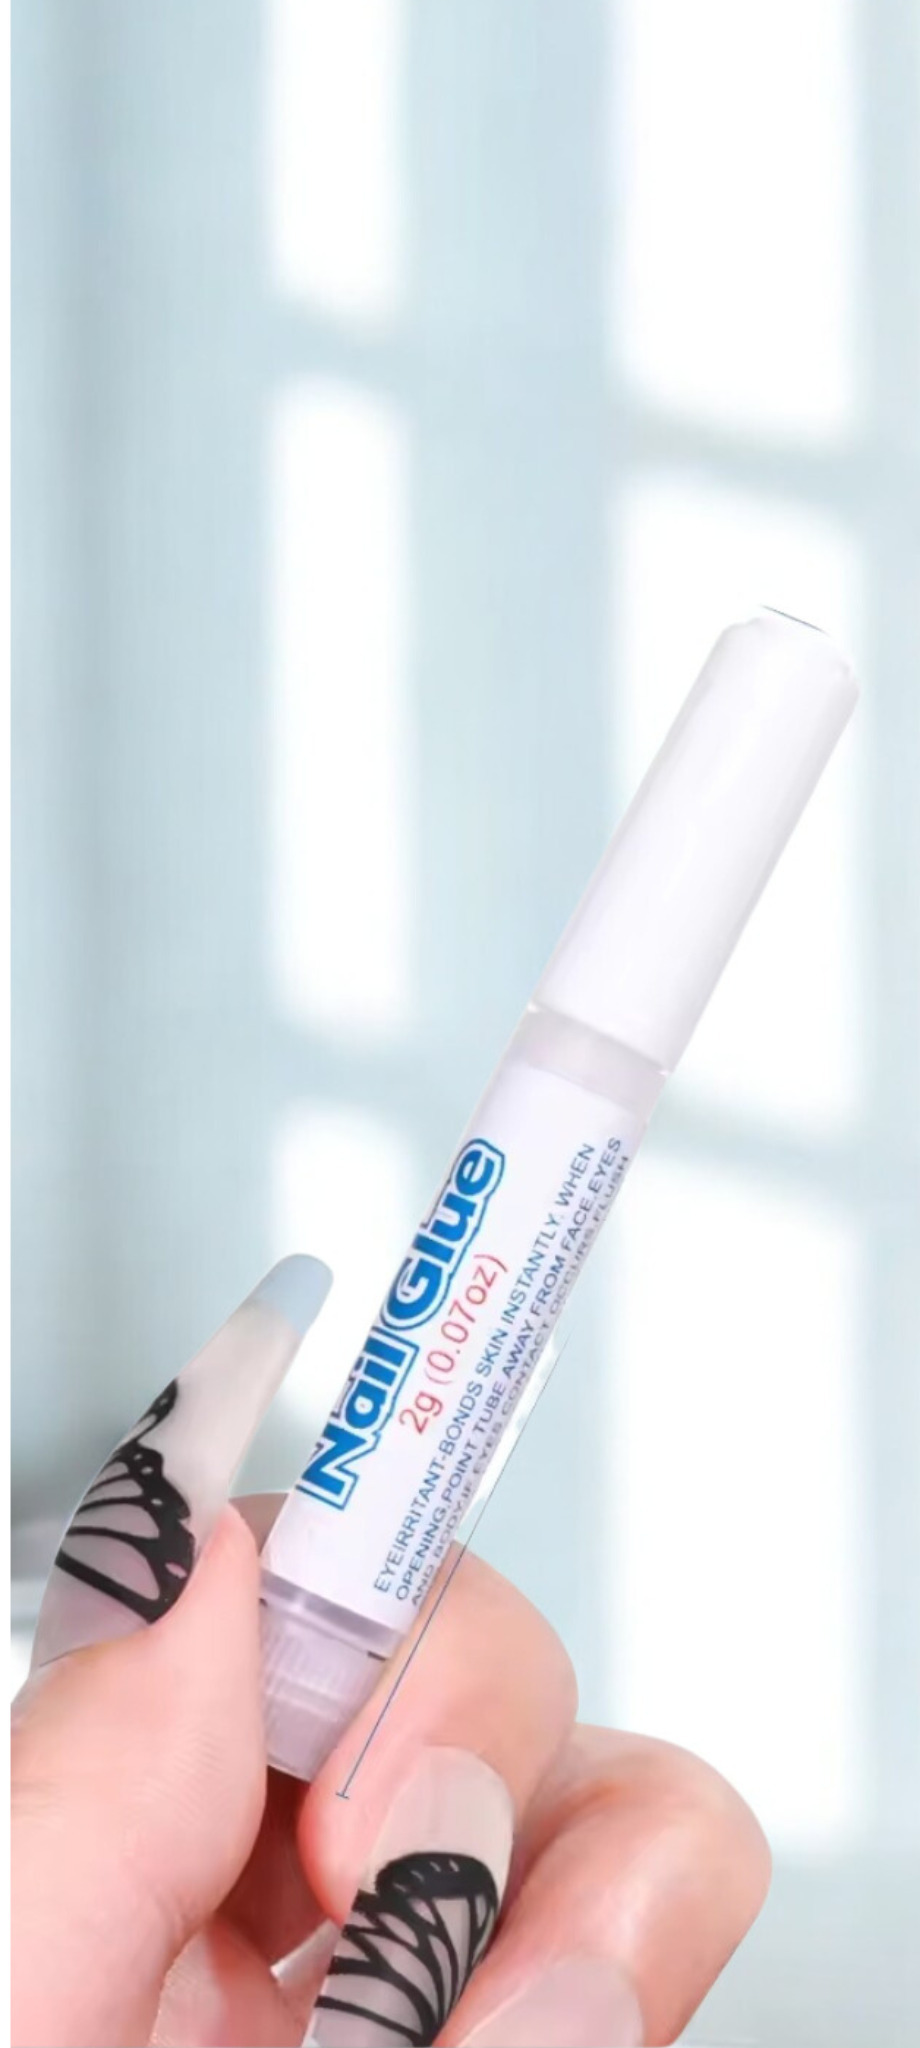
Solid Nail Glue Gel
(UV/LED Required) Long-lasting, strong hold Repositionable before curing Apply a small amount of solid glue gel to the press-on. Apply at a 45° angle, adjust if needed. Wipe away excess gel. Cure under UV/LED lamp for 1–3 minutes.

Nail Bond
$10.00
Nail Bond (Brush-On Nail Glue) 8ml What is it? Nail bond is a brush-on adhesive designed specifically for press-on nails. It applies like polish, giving you a smooth, even layer with no mess. Best For ✔ Press-on nails ✔ Long-lasting wear ✔ Clients who want a salon finish at home ✔ Anyone tired of nails popping off
REMOVAL
1. Prepare Your Tools
In a bowl, prepare warm water with soap and a small amount of oil to help loosen the adhesive.
2. Soak
Soak your fingers for 10–15 minutes to soften the adhesive.
3. Lift the Press-Ons
Using the complimentary cuticle stick, gently lift the press-on nails from the sides. Do not force removal. If needed, re-soak and try again.
4. Remove Residual Adhesive
Gently scrape away any remaining adhesive from your natural nails and the press-ons using the cuticle stick.
5. Store Your Nails
Place your press-on nails back into the complimentary storage case so they’re ready to be reused next time
